

Well, the Family Room Update is still a work in progress. Now that the painting is done, I'm left with the slow work of finishing the room with a rug and décor. I'm turning to Pinterest for inspiration because it's really not my area of expertise. But lets focus on the positive: the paint is on the walls, so that is a huge step in the right direction. If you'll remember, the Family Room opens right into the Sunroom/Playroom, so I'm counting it as one room. Here's a sneak peek:
 |
| The Family Room |
 |
| The Sunroom/Playroom |
Anyway, one of first the steps I knew I wanted to take was to get Kiddo's toy storage squared away. We purchased an Expedit from IKEA last spring, and I have to say that it's been wonderful for storing all the toys. For almost a year, I've used some dollar store bins in the cubbies. They worked well in Kiddo's nursery at the last house, and after that in a bookshelf we used to store his toys, but they were definitely not the correct scale for the Expedit.
 |
| To label these bins, I took a picture of the contents, printed it, cut it out, and attached it using clear packing tape. |
I wanted something to fit the space, but I have a hard time shelling out the cash for a set of bins when they're usually over $10 a pop, so I waited and asked for a set for Christmas.
Yes, on MY Christmas list. Even though they were for storing Kiddo's toys. Laaame! But seeing those bins every day puts a smile on my face, so it's totally worth it!
Anyway, I went with these adorable small Rugby Stripe Bins from The Container Store. I fell in love with them in Freckles Chick's playroom. Simple and timeless.
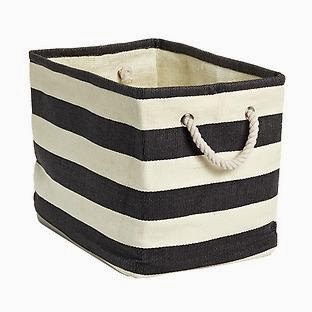 |
| Source: The Container Store |
And I'm so glad I chose them. A downside to these bins is that they collapse when they are empty. However, as long as they're somewhat full, they stand up nicely. Some might complain about them being floppy, but I love that my rough-and-tumble boy can't damage or break them by flopping or jumping on them, like he did with the ITSO bins we used for toy storage in our old house, or the dollar store bins (which have cracked under the weight of my dancing two-year-old). They are also slightly smaller than I expected, but they still hold plenty of toys.
Here's how I decided to label them. I did a google image search and found pictures of the types of toys I wanted to store in the bins, and then I pasted them into a word document. Once I printed the page out, I cut out each label and ran them though my personal laminator to make them durable enough for daily use.

If you don't have a personal laminator (I only have one because I got a great deal on one when I was studying to be a teacher), most print centers at office supply stores provide laminating services. Or, Dollar Tree sells clear contact paper that you could use like laminating to protect your labels. They won't hold up quite as well, but it's an option.
After I cut the labels out, I used a single hole punch to make two holes at the top of each label, attached them to the handles using zip ties I bought at the dollar store, and snipped off the excess.

As Kiddo would say, "Ta-da!" Big, cheerful labels that will make it easy for Kiddo to not only find his toys, but put them away! I've had them in place for over a week, and they are working beautifully.

I would be remiss if I didn't give a big shout-out to Jen over at IHeart Organizing. This project was completely inspired by ideas I saw on her blog. I got the idea to attach the labels with zip ties from her outdoor toy organization post, and her playroom basket post is a great example of labeling with pictures. Even the Freckles Chick playroom was featured on her blog!

It's amazing how such a small thing - like adding labels - can make such a difference in a space! Have you made any small changes in your home that have made a big impact?

I linked up this week at A Bowl Full of Lemons and Just A Girl and Her Blog.
Love it, super cute idea!!
ReplyDelete